
This menu can be accessed from the IT Settings Menu by pressing the Network Settings icon. after selecting this, a new screen will appear with a list of available networks to join. Additionally, there will be two icons at the top of the screen labeled Scan and Information.

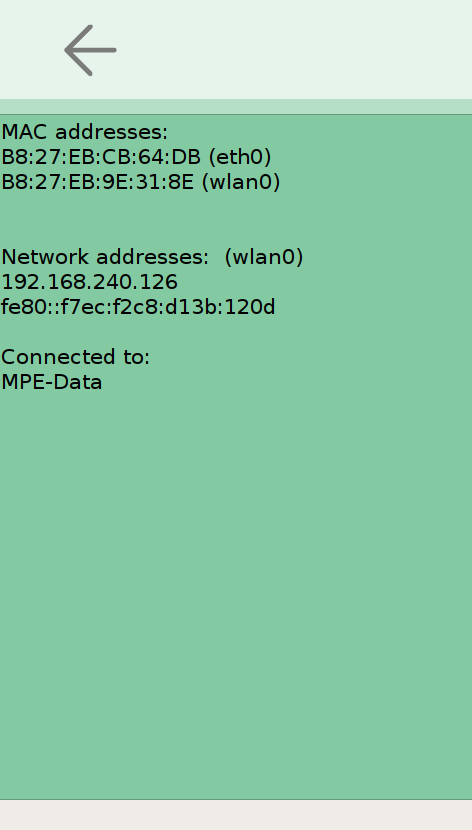
The Scan icon will scan for wireless networks when pressed. If the Information icon is pressed, a new screen will appear with some information about the current network status. This information will include the MAC address, Network Addresses, and Connection Status and the network that the system is connected to (if applicable).
Joining Wireless Networks
To join a wireless network, begin on the screen that appears after pressing the Network Settings icon. From the list of available networks, choose the desired network to connect to and press it. A new screen should appear. This screen will either include two icons that read Connect and Forget or include a prompt asking for the network passphrase and a blank to enter the passphrase. In the first situation, choose to connect to the network with the Connect icon and enter a passphrase if prompted afterwards. In the second situation, simply enter the passphrase. Be sure to press the save icon after entering a passphrase to update the information. To check that a network connection was established, use the Information icon to check the network status.
Connecting to a Network Via Ethernet
To make an Ethernet connection, the front panel must be removed to access the Ethernet port on the embedded computer. The access panel can be removed by first removing the cassette and then removing the 3 screws that secure the access panel to the cabinet. Please see the Installation Instructions information on accessing the Ethernet port and completing the Ethernet connection (Other Manuals).
Post your comment on this topic.